4 月 28
嗨!大家好!好久沒有寫文章了!
————————————————————
今天要交大家怎麼做衣服~一定有很多人不知道吧?現在我來教大家~
一、
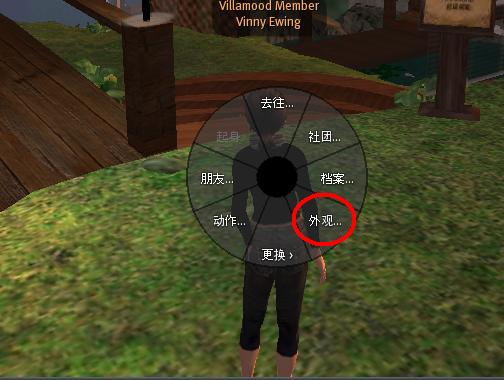
先選擇自己,然後按「外現」
二、
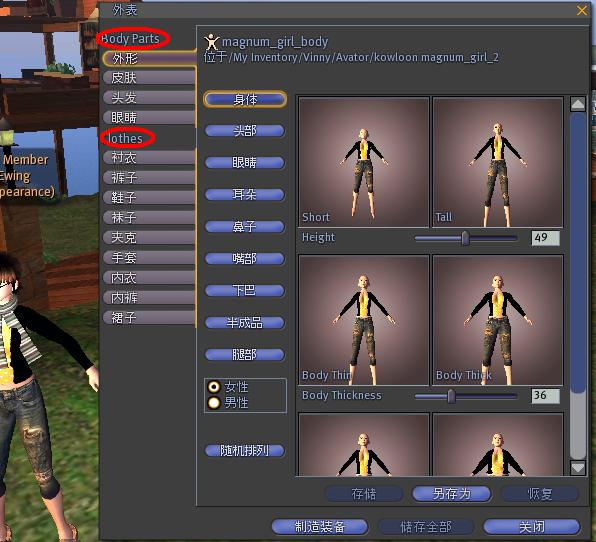
然後會有一個視窗,分為「Body Parts」與「Clothes」
三、
「Clothes」那一欄有上衣、褲子、外套等......
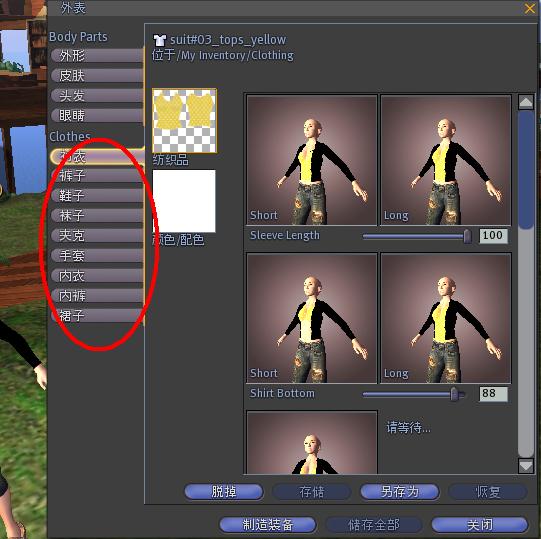
四、
拿裙子來示範好了,在「Clothes」那一欄按「裙子」
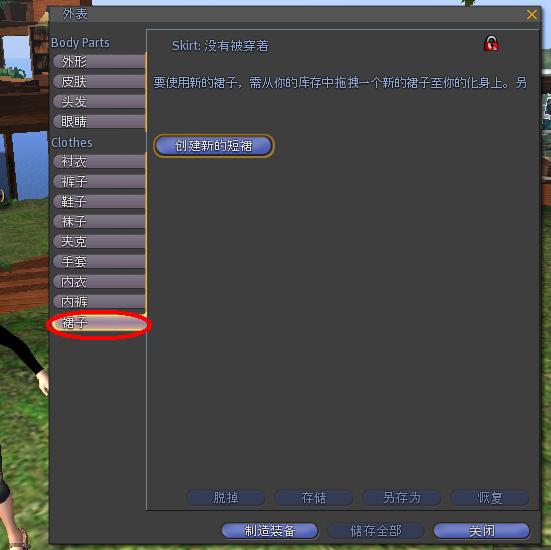
五、
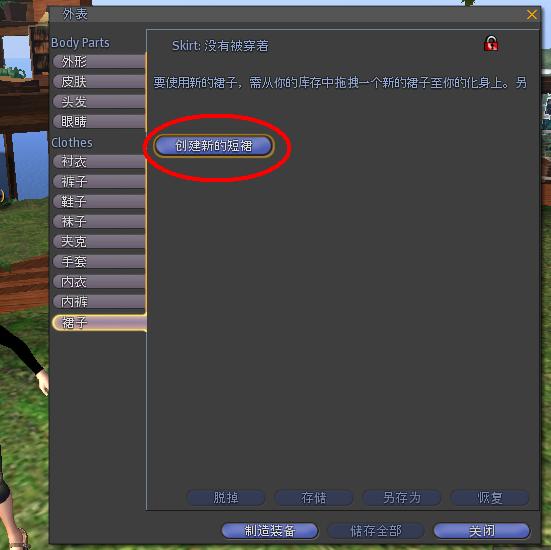
這時,如果你身上沒有穿裙子,就會有一個「創造新的短裙」(一定要沒穿裙子才行喔)
六、
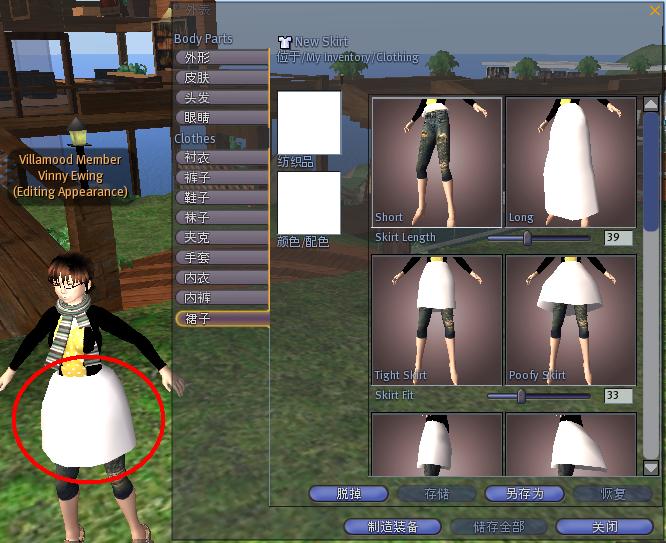
按下去,你身上就會出現一個新裙子
七、
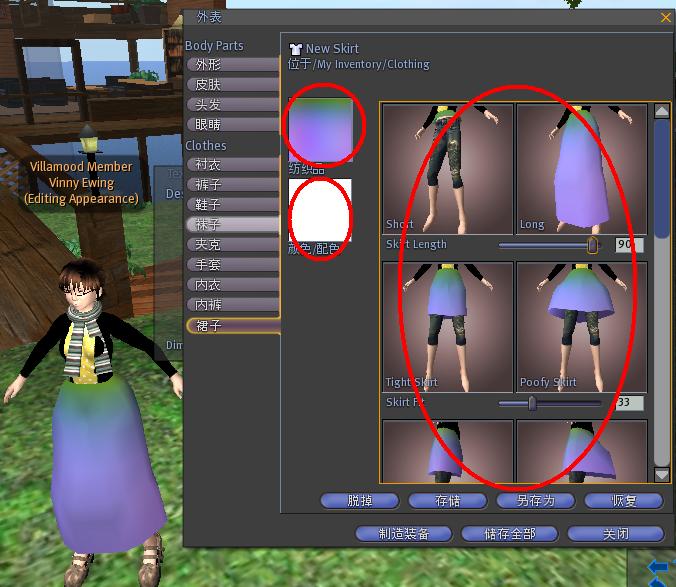
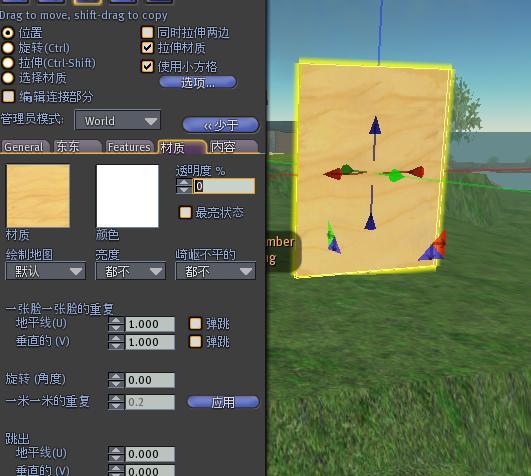
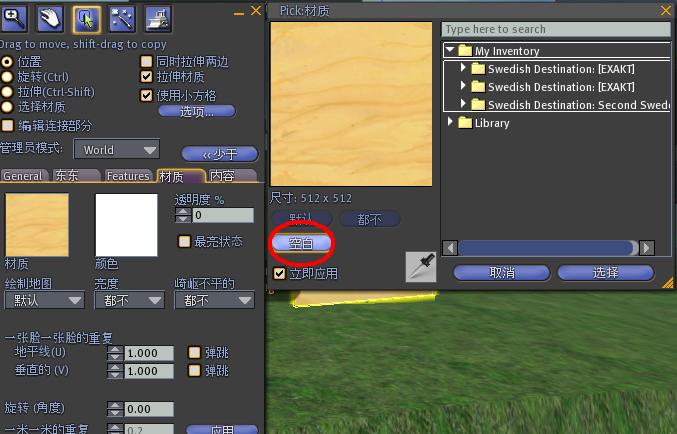
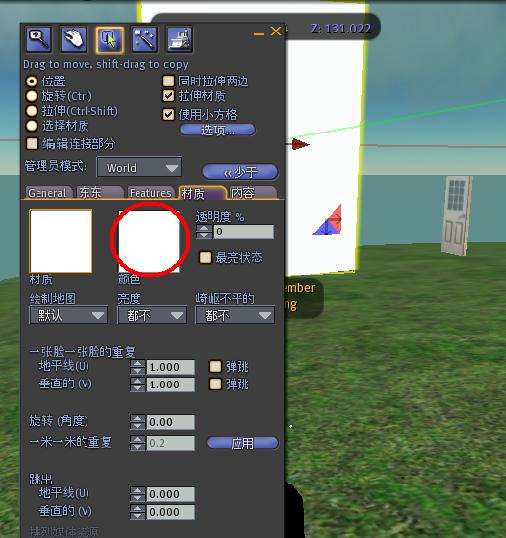
可以調整或換材質
八、
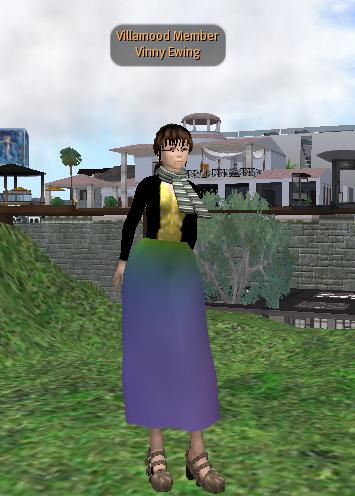
這樣就完成了!
3 月 02
今天要教大家怎麼樣賣東西~
一、
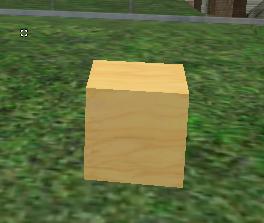
這邊有個正方形
二、
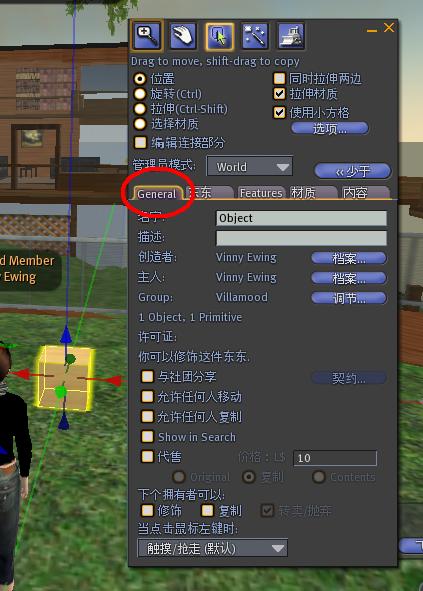
編輯正方形,按「General」
三、
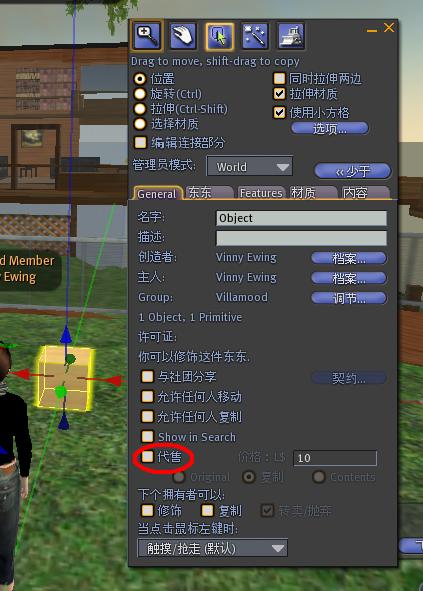
把「代售」這一格打勾
四、
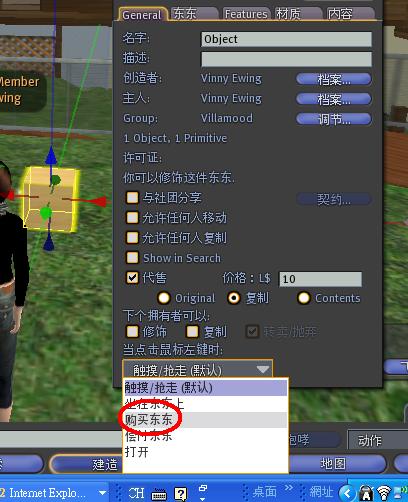
在「當點滑標左鍵時」點一下,會有一個單子出來,按「購買東東」
五、
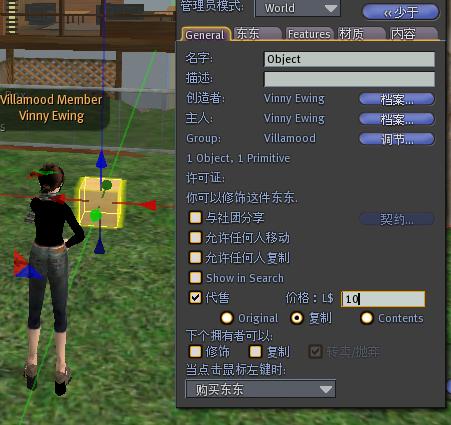
有一個「價格」格子,可以調整價格

這樣這個東西就可以賣了
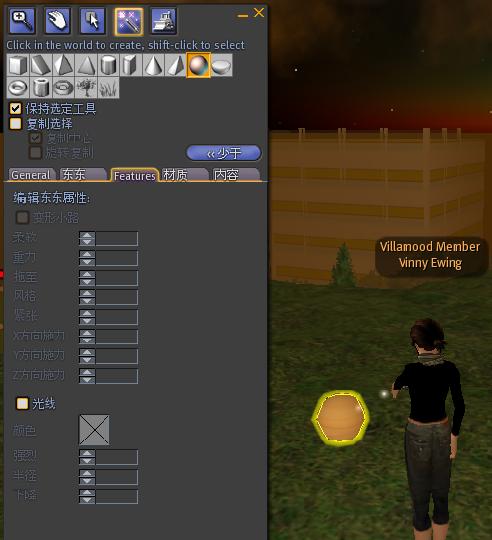
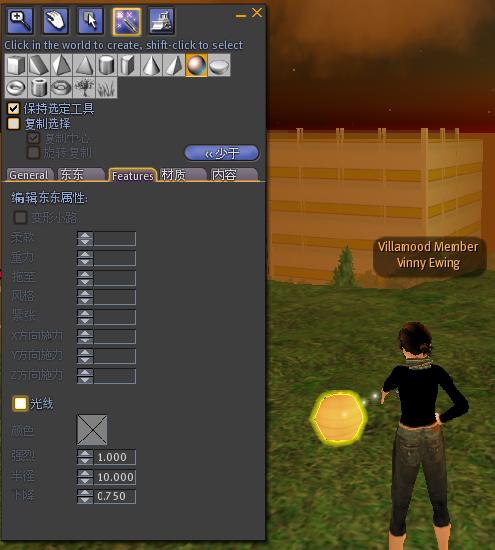
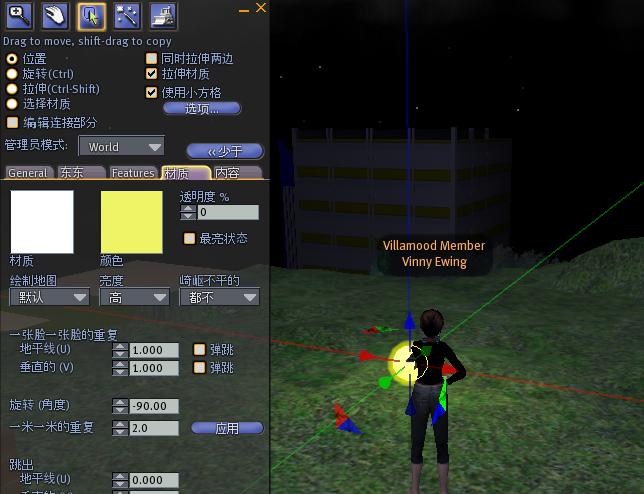
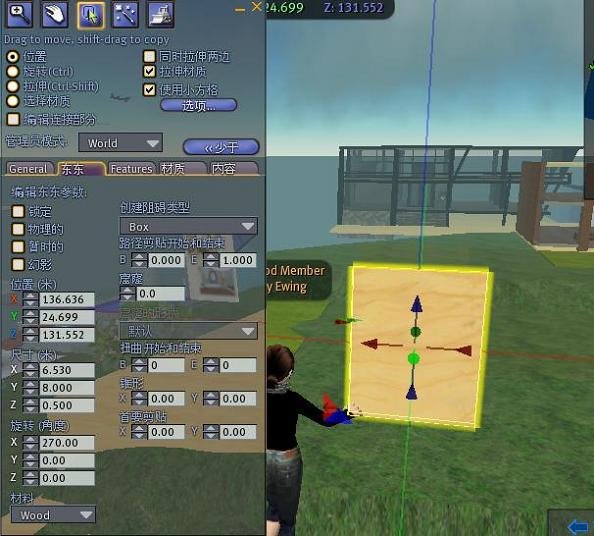
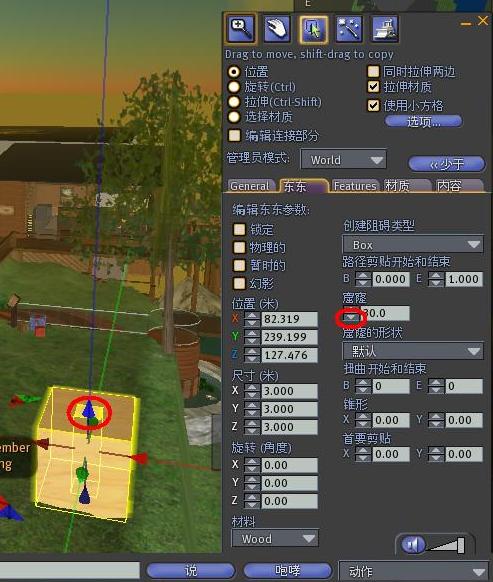
3 月 02
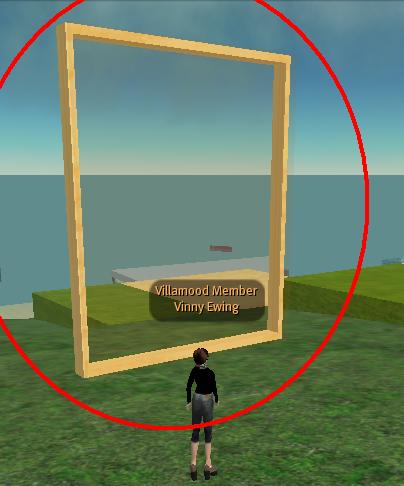
這次要教大家做圓形的落地窗~
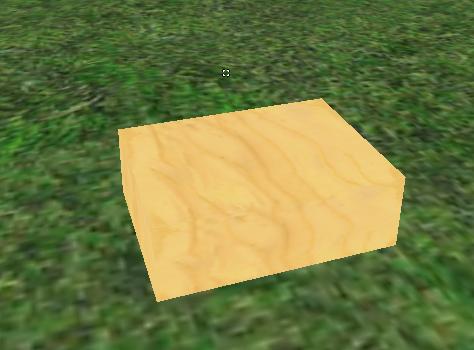
一、
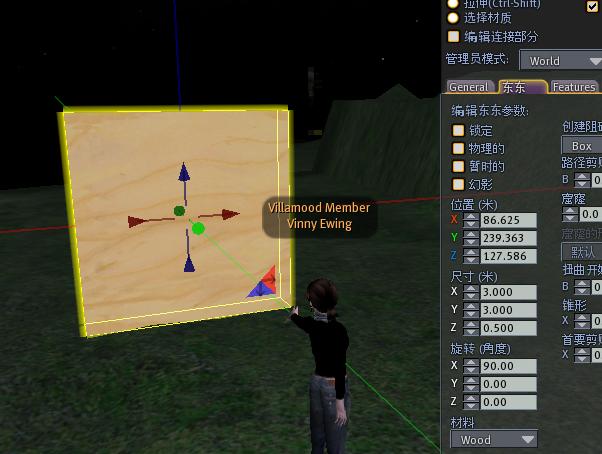
先做一個牆壁
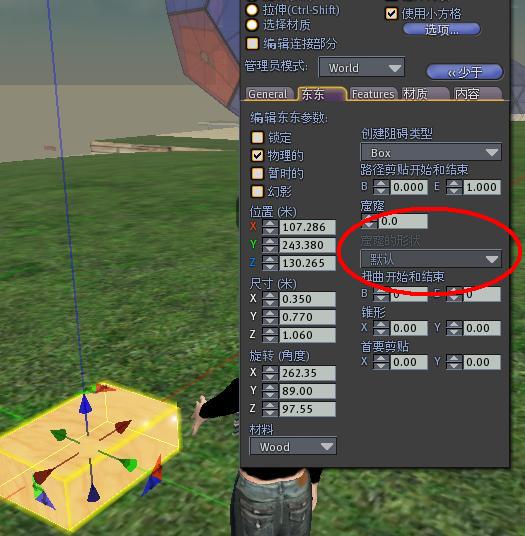
二、
調「窟窿」
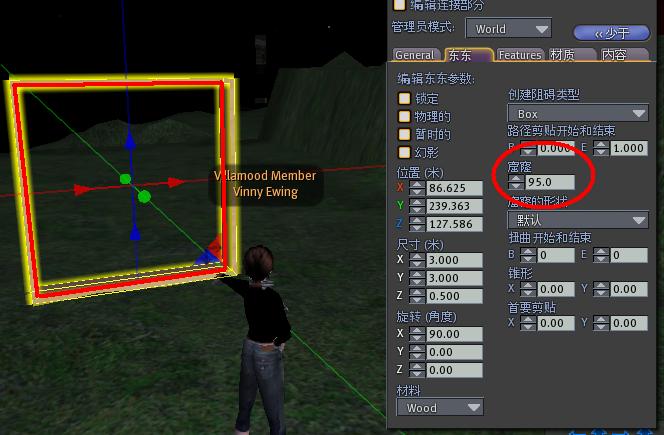
三、
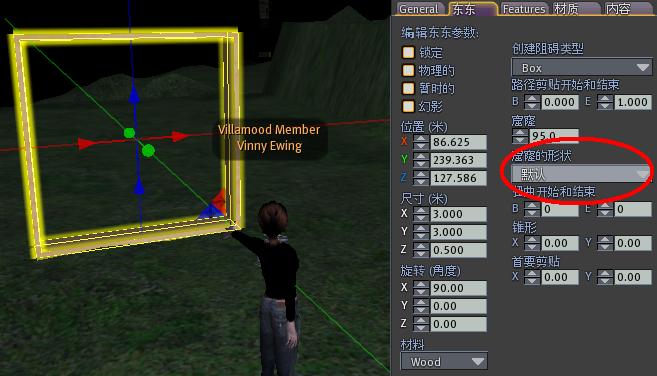
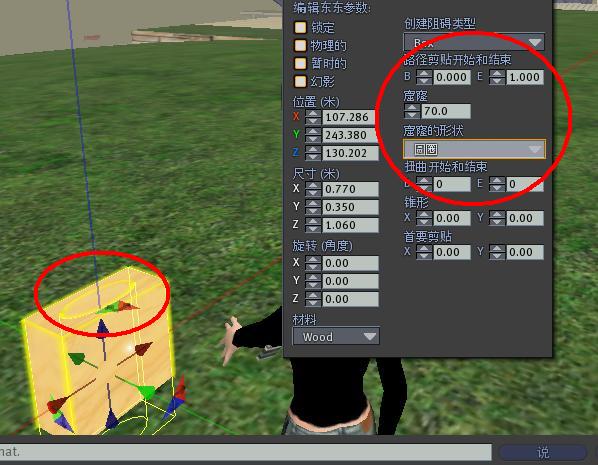
看到「窟窿的形狀」
四、
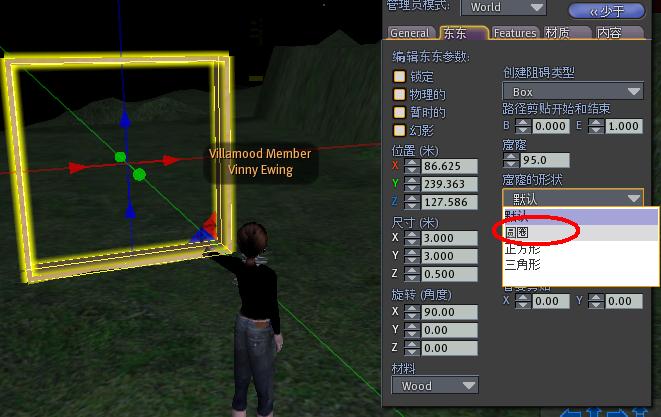
按下去,選「圓圈」
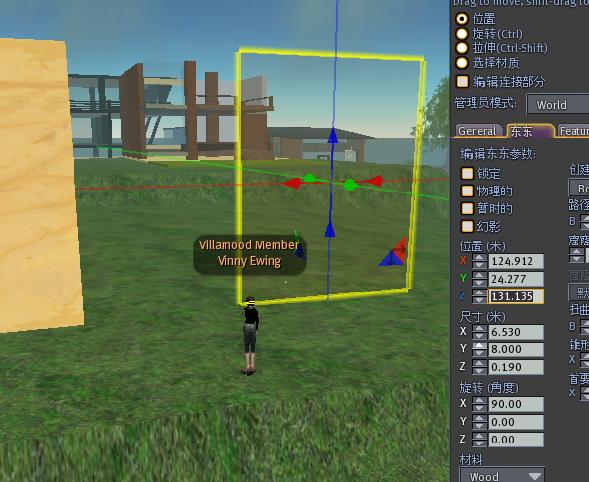
五、
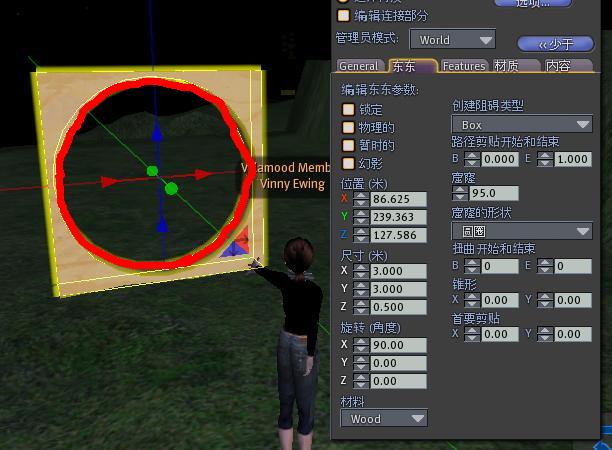
選好後,它就會變成圓的
六、
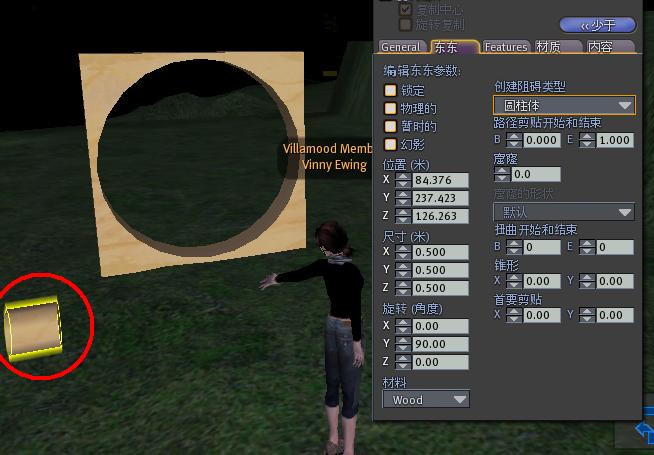
創造一個「圓柱體」記得喔!是圓柱喔!
七、
把圓柱調成跟牆壁一樣大
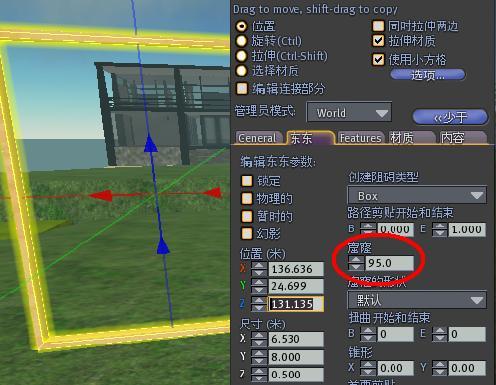
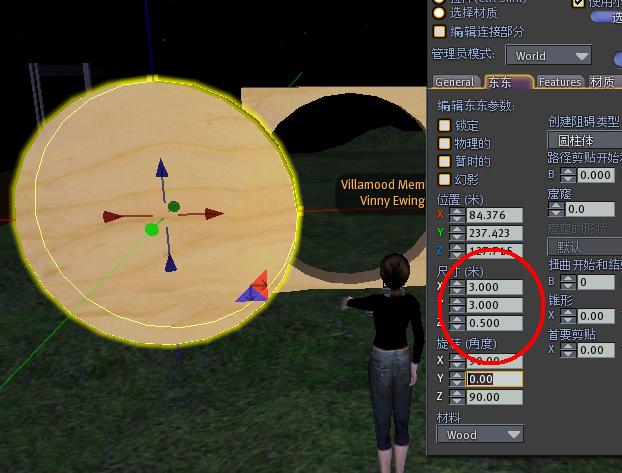
八、

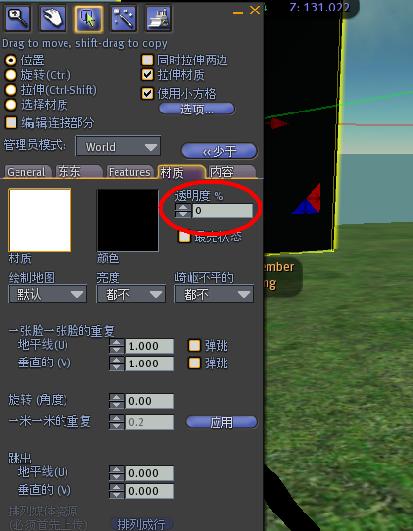
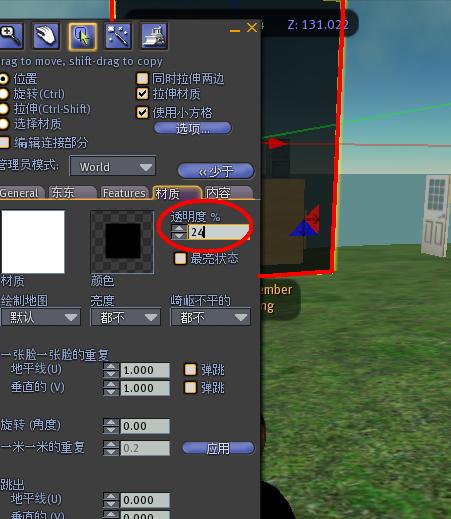
調透明度,讓圓柱變成玻璃(見「玻璃做法」)
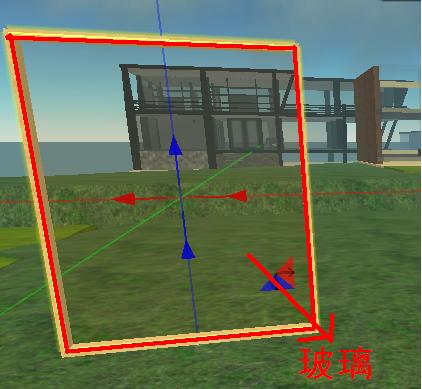
九、
把位置調成跟牆壁一樣
十、
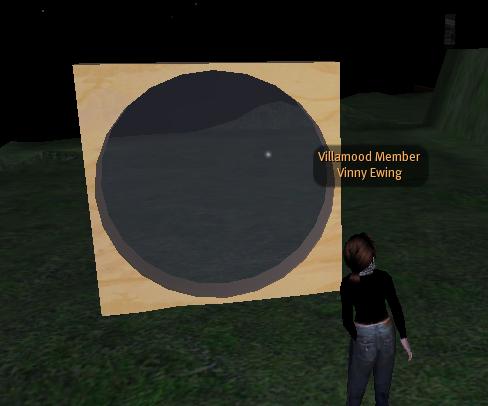
這樣就完成了!話說本來打完這一篇要寫三角型的落地窗,沒想到做不出來......下次在研究看看!
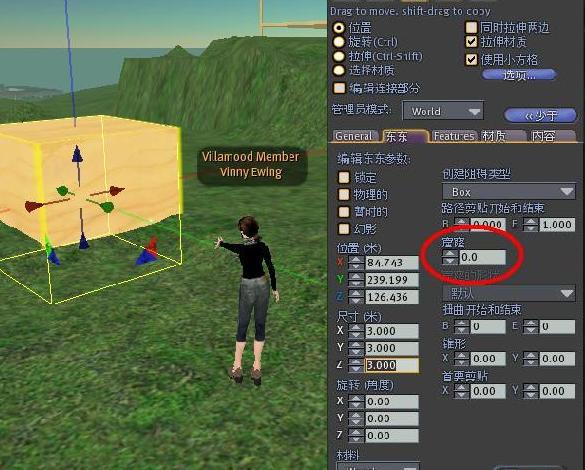
3 月 01
大家在上次已經學會的怎麼弄「窟窿」我今天就教大家如何製作不一樣的「窟窿」
一、
現在大家看到地上有一個長方形
二、
按編輯會看到一個「窟窿的形狀」
三、
按「圓圈」窟窿就會變成圓的,按別的,就會變成別的形狀喔!
下次在交各位做「各種形狀的落地窗」
3 月 01
某天,我在隔壁那塊地看到了骨牌......
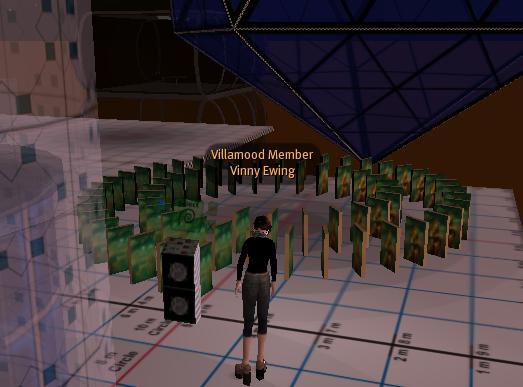
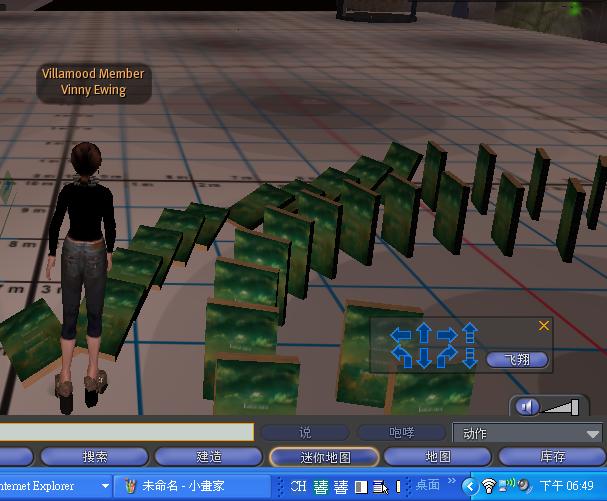
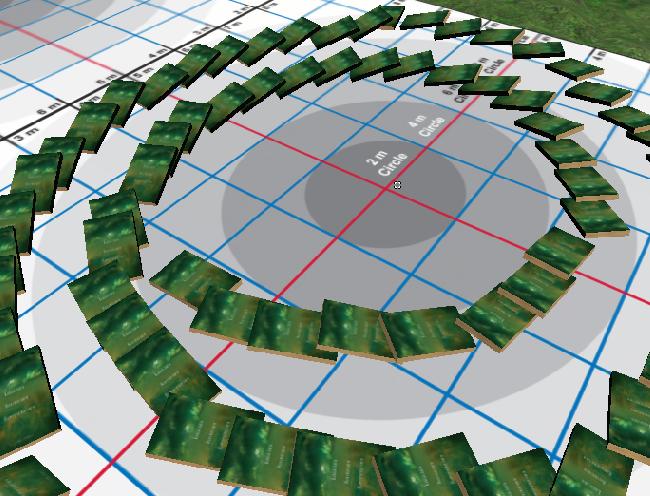
因為有興趣,所以我特別研究了做骨牌的方法......
一、
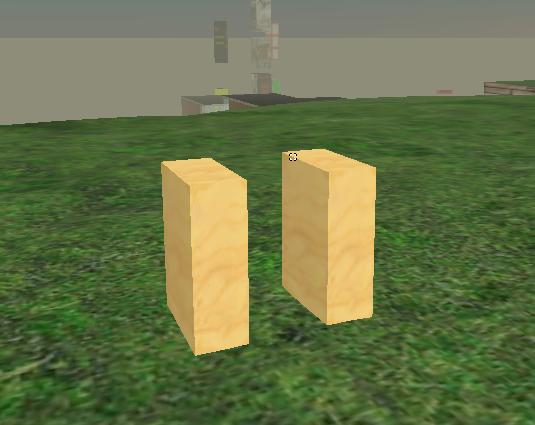
創造兩個長方形
二、
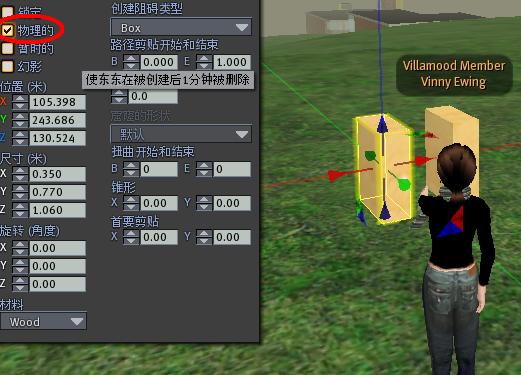
按「編輯」把「物理的」打勾
三、
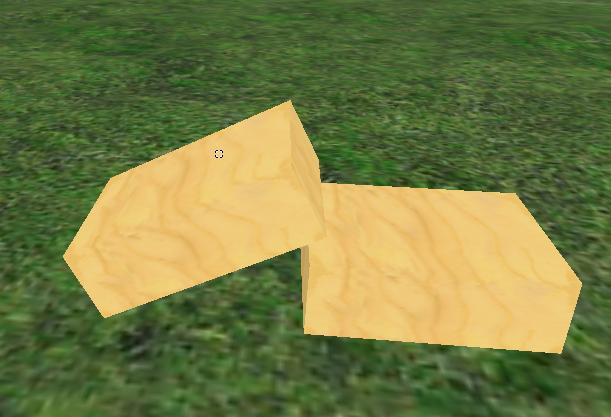
把兩個長方形都按「物理的」之後,你一推,它就倒了